
Using Gqrx with USRP SDR's and DSD voice decoding on Mac OS X without losing your mind
The Problem: Homebrew formula is a rotten Brew!
Over the last few years, using the gqrx package was as simple as using homebrew. However, over late, the keepers of the brew formula hasn’t maintained the build with the most recent gr-osmosdr and Ettus Research UHD Library. So rather than depend on the brew formula, go grab the source and build your own version guaranteed to be up-to-date – and working on your USRP device!
Grab the source
So, the latest source (as of this writing 2.11.5) is available on the gqrx download section of their website.
Grab the code and use brew to install the dependencies. Specifically:
- uhd
- gr-osmosdr
- gnuradio
- Qt5
Also, make sure you have cmake installed as well as ccmake. Homebrew works well for all the dependencies - cmake included.
Caveats
In order to build gqrx you’ll need to run ccmake* and make sure you’ve configured cmake so that it can find your Qt5 and gnuradio directories. It’s not expecting them in the Cellar, so you’ll need to manually update these paths.
For example, I updated the Qt5_DIR to point to /usr/local/Cellar/qt/5.12.0/lib/cmake/Qt5 and I updated the Gnuradio_DIR to point to /usr/local/Cellar/gnuradio/3.7.13.4_2/lib/cmake/gnuradio .
Now you should be able to configure your cmake and successfully run the makefile in the traditional cmake-way:
$ mkdir build
$ cd build
$ cmake ..
$ make
If all goes as expected, you’ll see your gqrx executable in ./build/src/gqrx
DSD Voice decoding!
Now that you have a working gqrx for your Ettus, confirm that it works with your device string. For simplicity, start gqrx with the -r option to reset the configuration. Then add the simple keyword, uhd, to indicate that you are using a USRP device. That’s it!
If all’s good, let’s get the DSD decoder cooking! Grab the DSD repo and clone it. But before you build it, make certain you brew up the dependencies for DSD:
- libsndfile
- itpp
- portaudio
- mbelib
Building the DSD decoder is as simple as:
git clone https://github.com/szechyjs/dsd.git
cd dsd & mkdir build && cd build
cmake ..
make
sudo make install
You can see that your dsd binary is working and can see your audio devices by running dsd -a:
Digital Speech Decoder 1.7.0-dev (build:v1.6.0-91-gf175834)
mbelib version 1.3.0

PortAudio version number = 1246720
PortAudio version text = 'PortAudio V19.6.0-devel, revision 396fe4b6699ae929d3a685b3ef8a7e97396139a4'
Number of devices = 4
--------------------------------------- device #0
[ Default Input ]
Name                        = Rob's AirPods
Host API                    = Core Audio
Max inputs = 1, Max outputs = 0
Default sample rate         = 16000.00
--------------------------------------- device #1
[ Default Output ]
Name                        = Rob's AirPods
Host API                    = Core Audio
Max inputs = 0, Max outputs = 2
Default sample rate         = 48000.00
--------------------------------------- device #2
Name                        = MacBook Pro Microphone
Host API                    = Core Audio
Max inputs = 1, Max outputs = 0
Default sample rate         = 48000.00
--------------------------------------- device #3
Name                        = MacBook Pro Speakers
Host API                    = Core Audio
Max inputs = 0, Max outputs = 2
Default sample rate         = 44100.00
----------------------------------------------
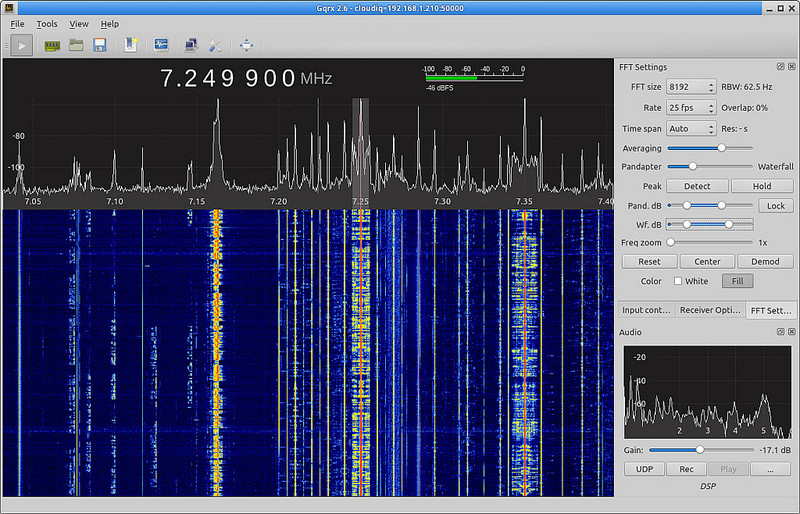
Now to connect DSD with Gqrx is as simple as using nc (netcat). This handy Unix tool lets us plumb up anything and everything UDP/TCP. For our application, we want to send the datastream from Gqrx to the DSD command so it can decode the voice on the frequency that we’re watching. Fortunately, Gqrx has a built-in UDP streaming capability. To send data to the default UDP port (7355), we simply select the UDP button on the Gqrx Receiver Options panel on the UI. Once selected, the radio packet data will stream to the UDP port.
Next, lets start up netcat and pipe it to DSD to decode. This is simply done as follows:
$ nc -l -u localhost 7355 | ./dsd -i - -o pa:1
Our netcat command listens to UDP traffic on our local box on port 7355 and pipes it to DSD. The -i option followed by the dash tells DSD to take data from stdin (hence our pipe), and the -o option selects our output. Here I’m sending it to my AirPods.
If you are successfully sitting on a frequency that has DSD data to decode (such as P25 Phase 1, D-STAR, NXDN48* (6.25 kHz) / IDAS*, NXDN96 (12.5 kHz), ProVoice*, DMR/MOTOTRBO, or X2-TDMA) then you will see something similar in your terminal:
Sync:  +DMR       mod: GFSK inlvl: 11% [slot0]  slot1   CSBK
Sync:  +DMR       mod: GFSK inlvl: 11%  slot0  [slot1]  Slot idle
Sync:  +DMR       mod: GFSK inlvl: 11% [slot0]  slot1   CSBK
Sync:  +DMR       mod: GFSK inlvl: 11%  slot0  [slot1]  Slot idle
Sync:  +DMR       mod: GFSK inlvl: 11% [slot0]  slot1   CSBK
Sync:  +DMR       mod: GFSK inlvl: 11%  slot0  [slot1]  Slot idle
Sync:  +DMR       mod: GFSK inlvl: 11% [slot0]  slot1   CSBK
Sync:  +DMR       mod: GFSK inlvl: 11%  slot0  [slot1]  Slot idle
Sync:  +DMR       mod: GFSK inlvl: 11% [slot0]  slot1   CSBK
Sync:  +DMR       mod: GFSK inlvl: 11%  slot0  [slot1]  Slot idle
Sync:  +DMR       mod: GFSK inlvl: 11% [slot0]  slot1   CSBK

...
and if you aren’t on a DSD channel, you’ll see the no Sync: indication. Just because you’re synced doesn’t mean you’re going to hear anything. The channel may be idle! Don’t panic. It’s all working - but no one is talking. Wait around on the channel and you’ll eventually hear the decoded voice audio on the channel once someone starts talking!
Enjoy!
--Rob